Posts tagged create
FREE ebook: 101 free(ish) things to make and do with your children
ebook cover.png
clay portrait.jpg
IMG_8704.jpg
IMG_8225 2 (2).jpg
IMG_8194.jpg

Welcome back! It’s been a while. I’d be happy to just ignore that year-long hiatus, but I’ll be honest: I debated not coming back at all. Blogs aren’t what they were and I miss those good old days. Before social media made everything else feel slow and cumbersome. Before sponsored posts took the authenticity out of everything. And before people were more interested in gaining likes than they were having a discussion or enjoying their lives away from a tiny camera lens.

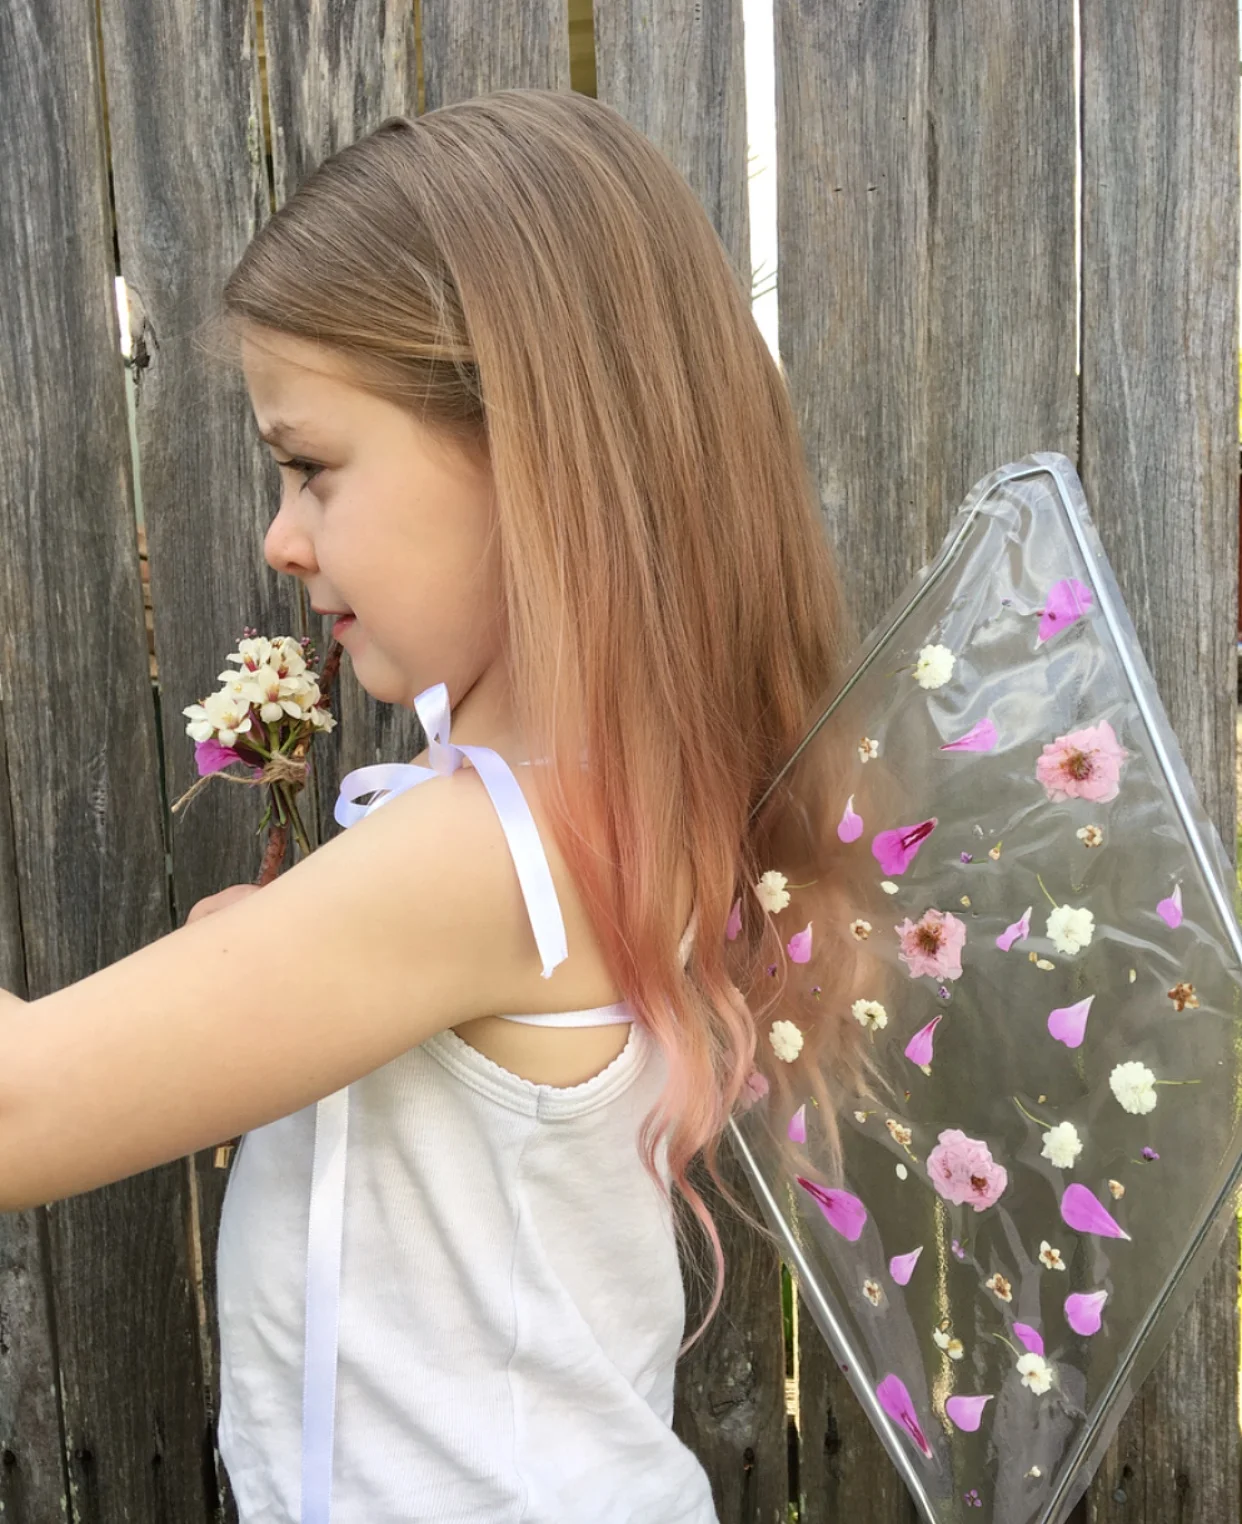
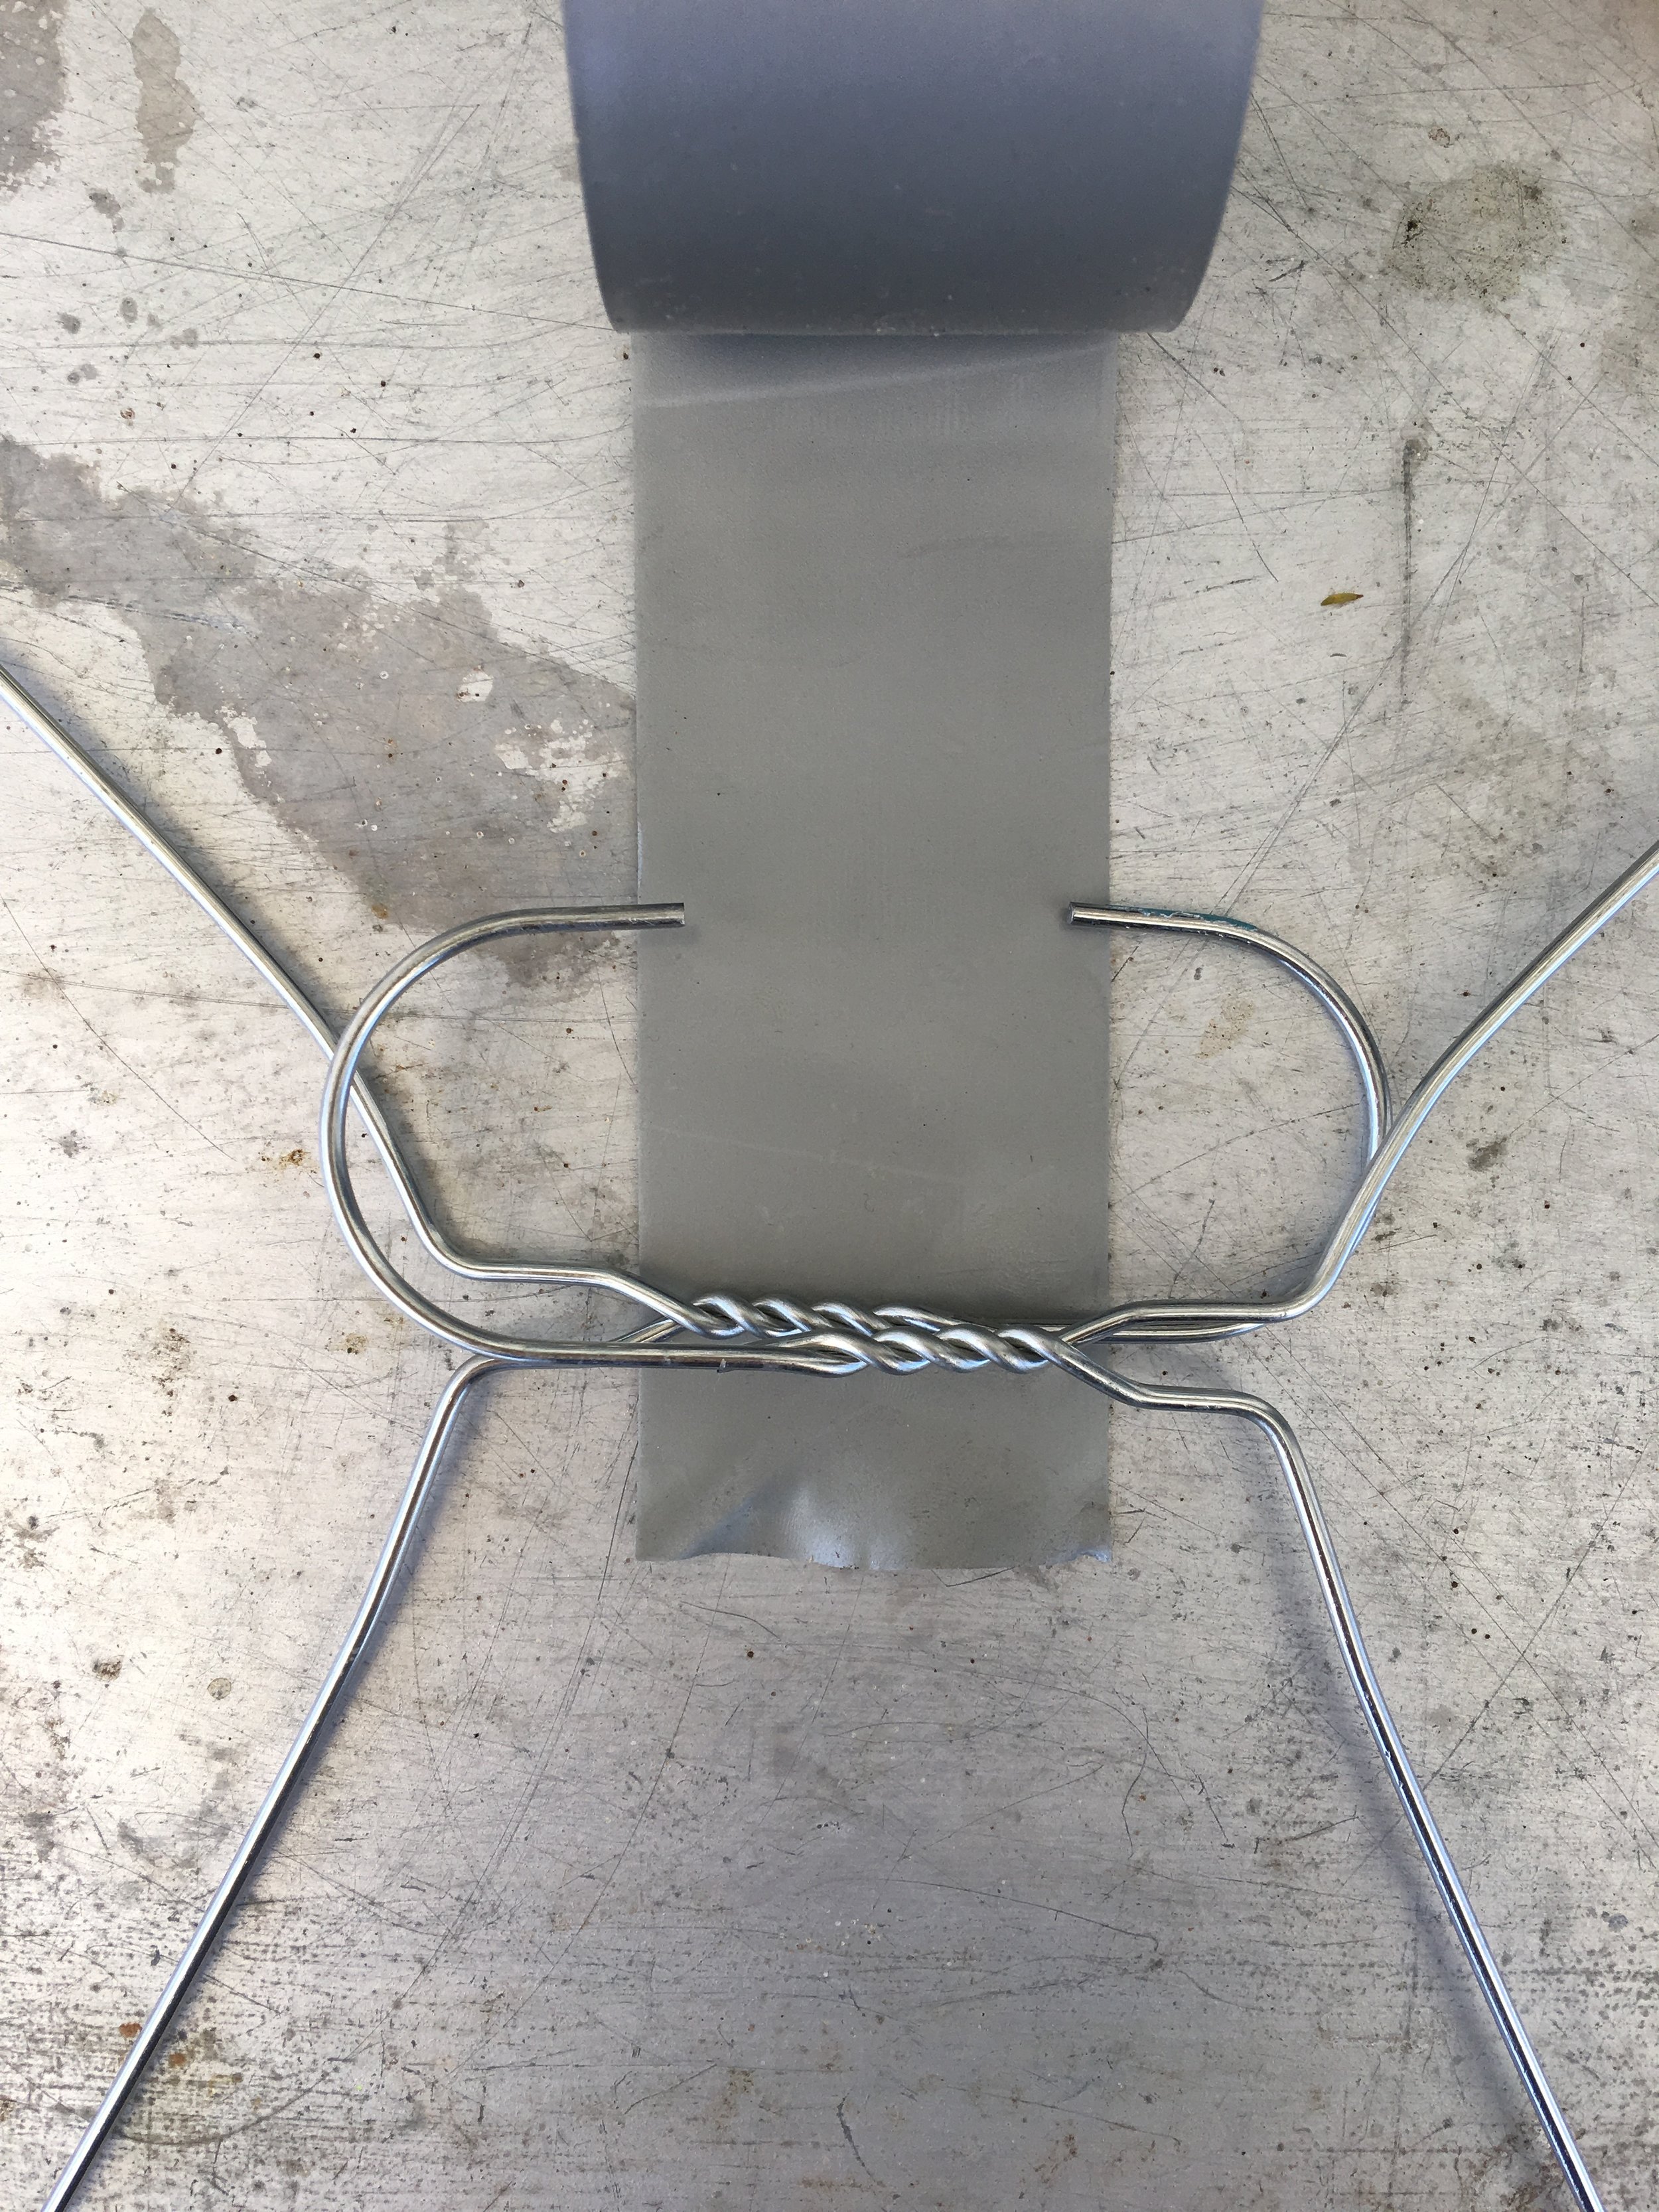
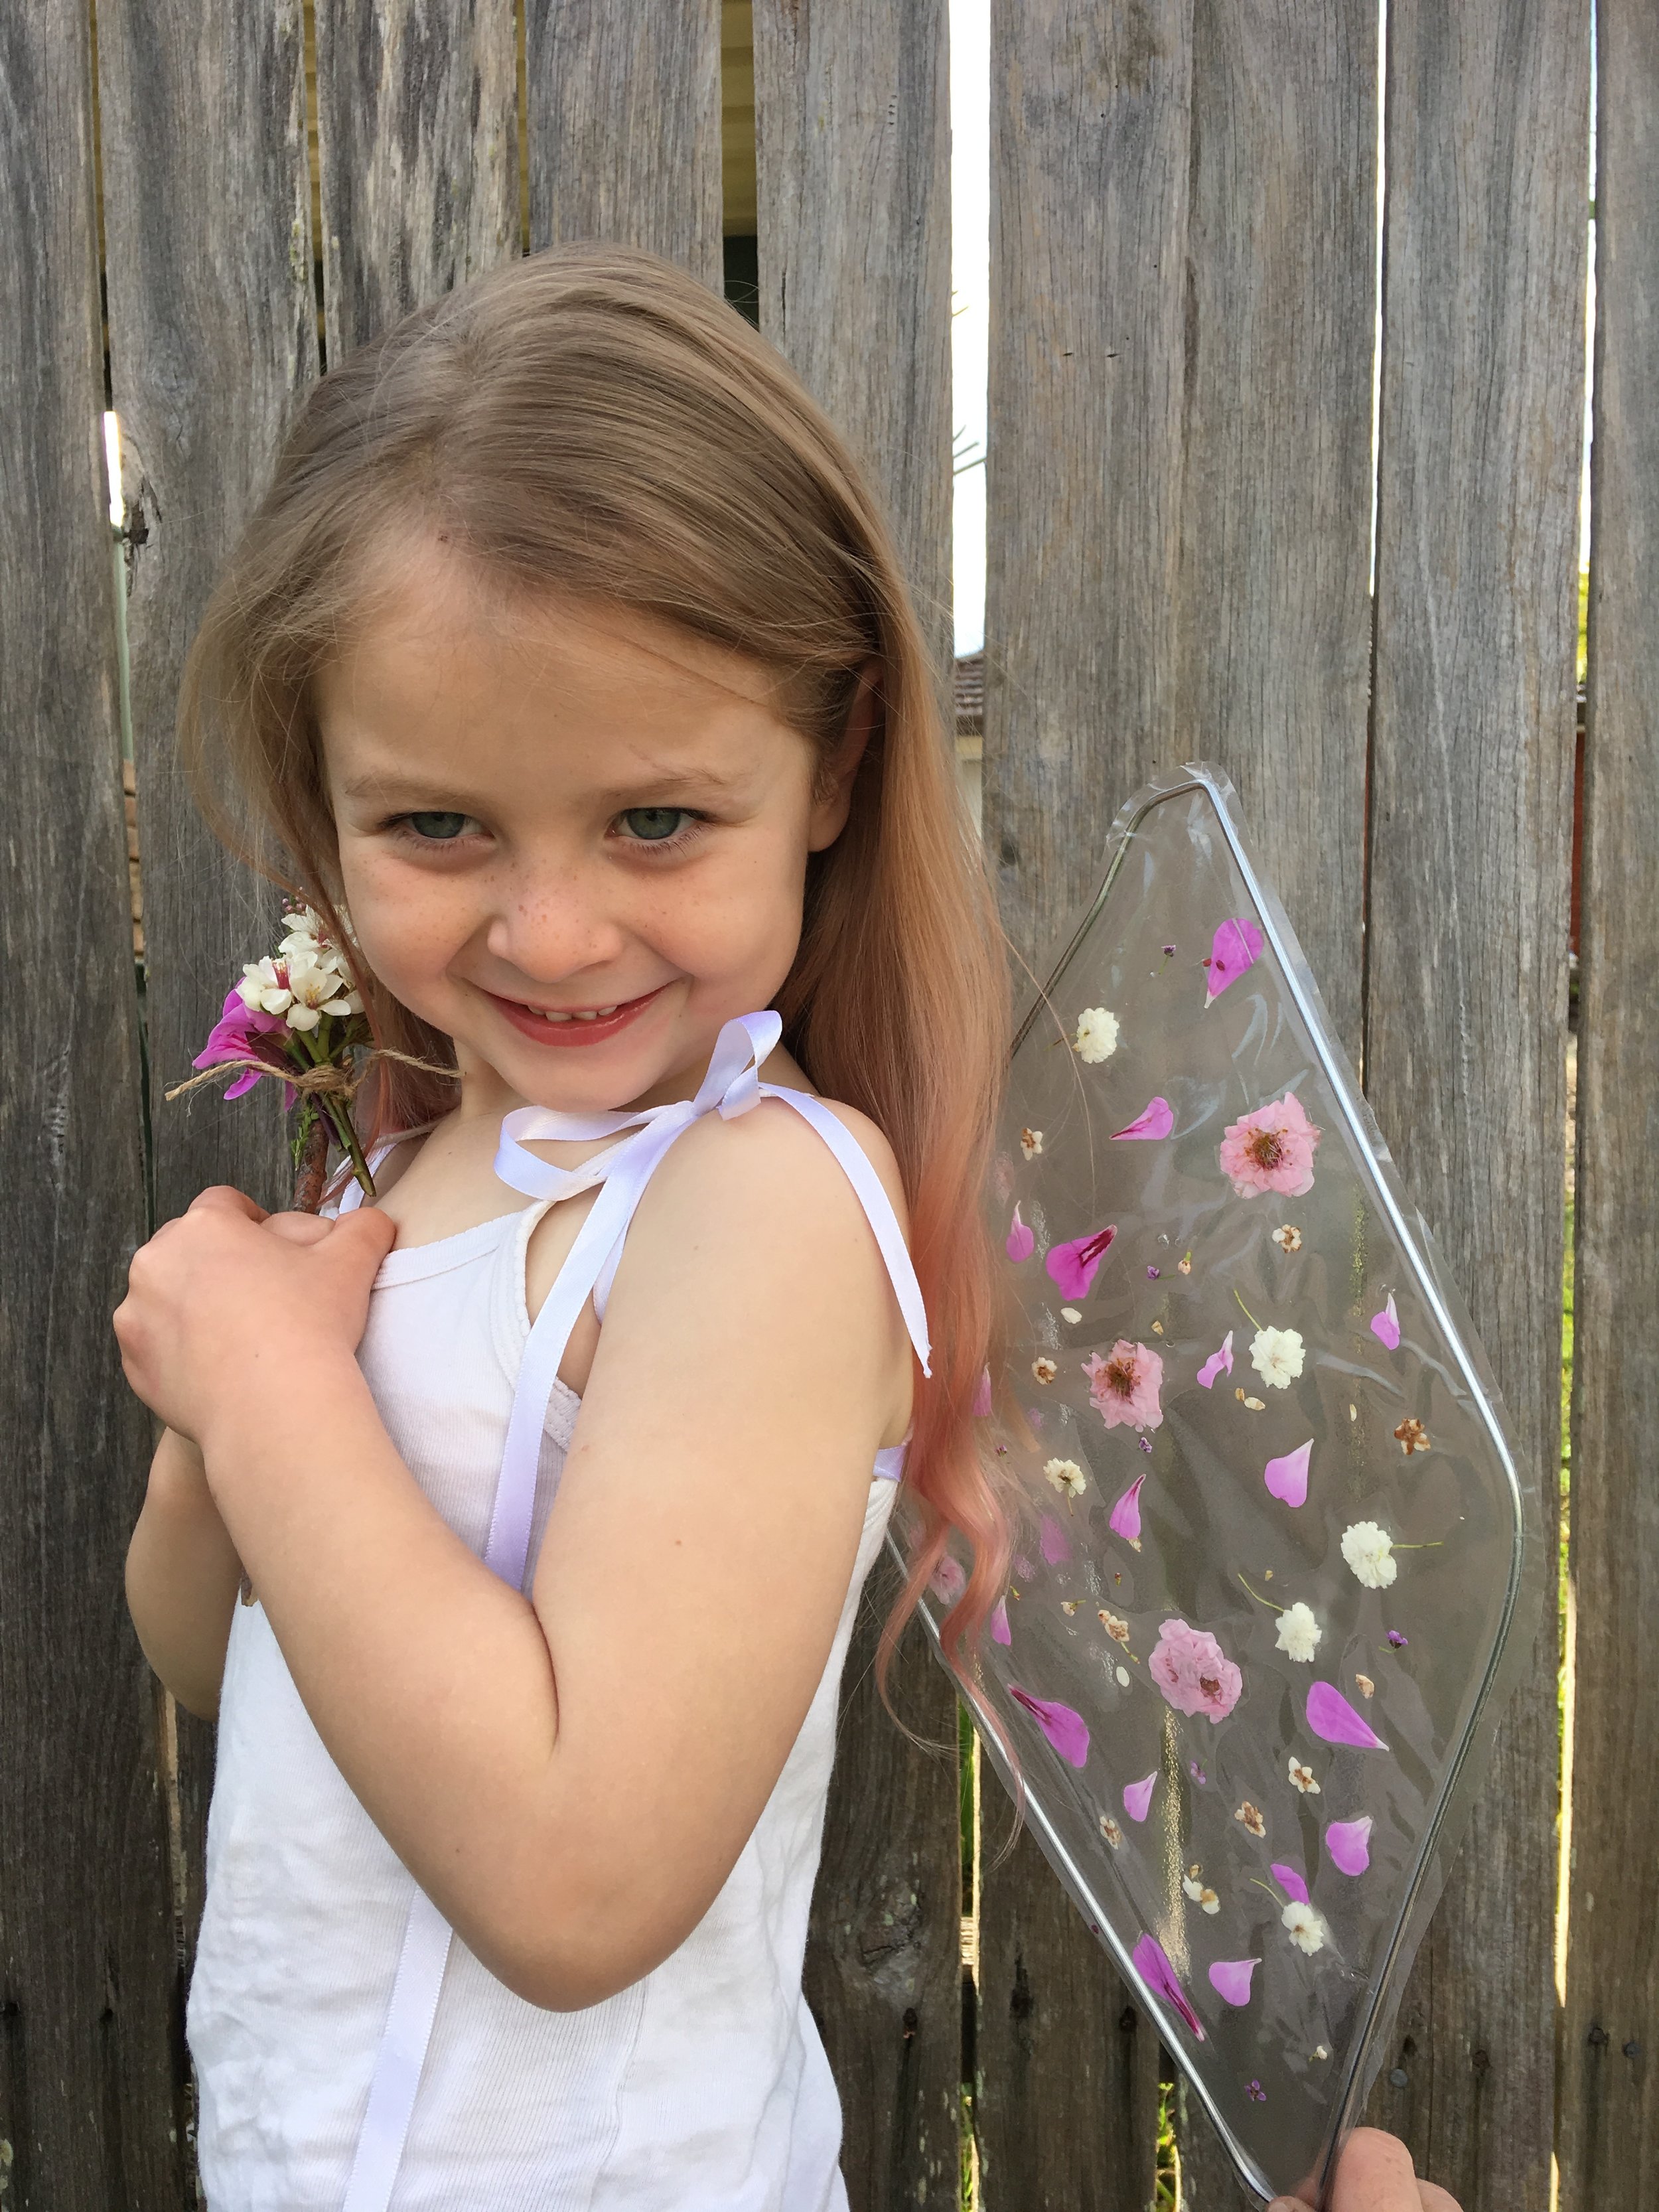
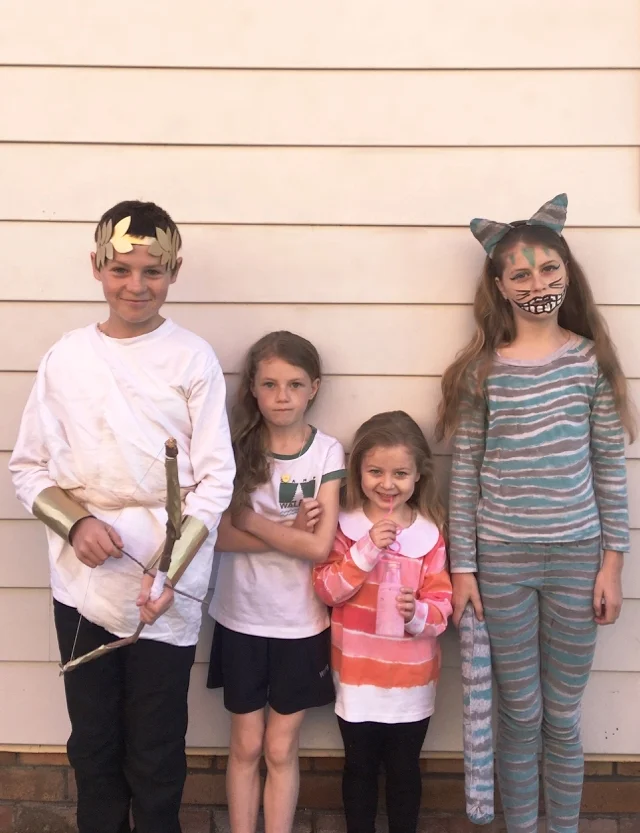
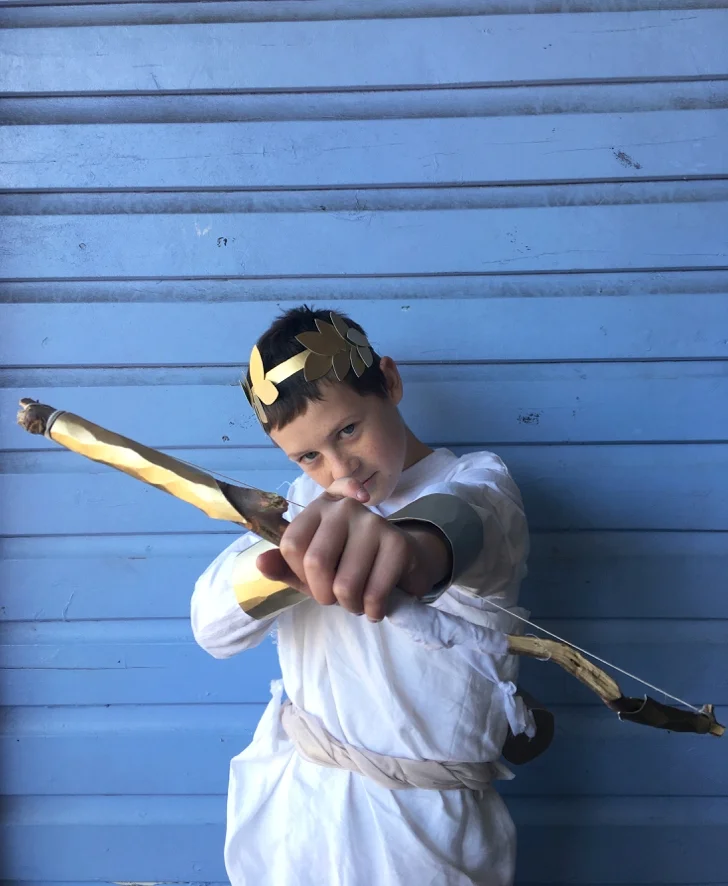
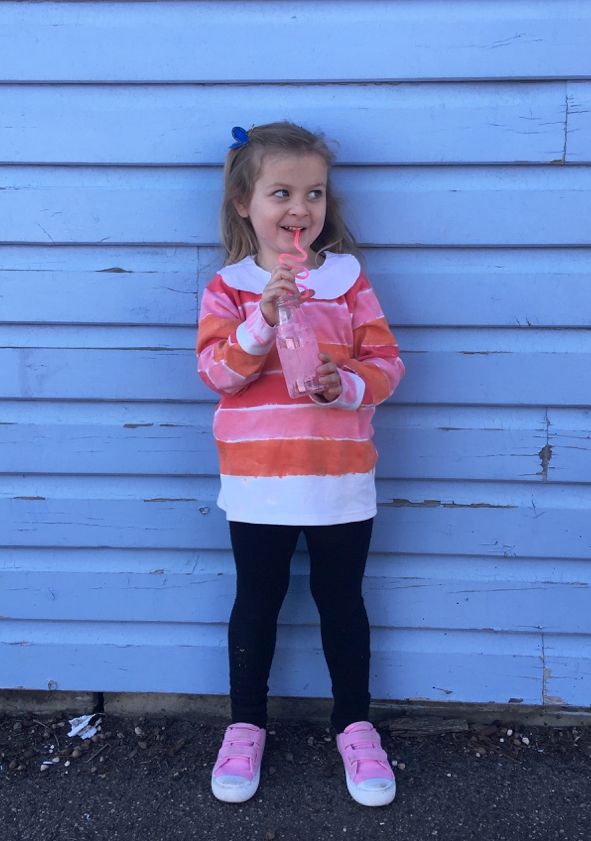
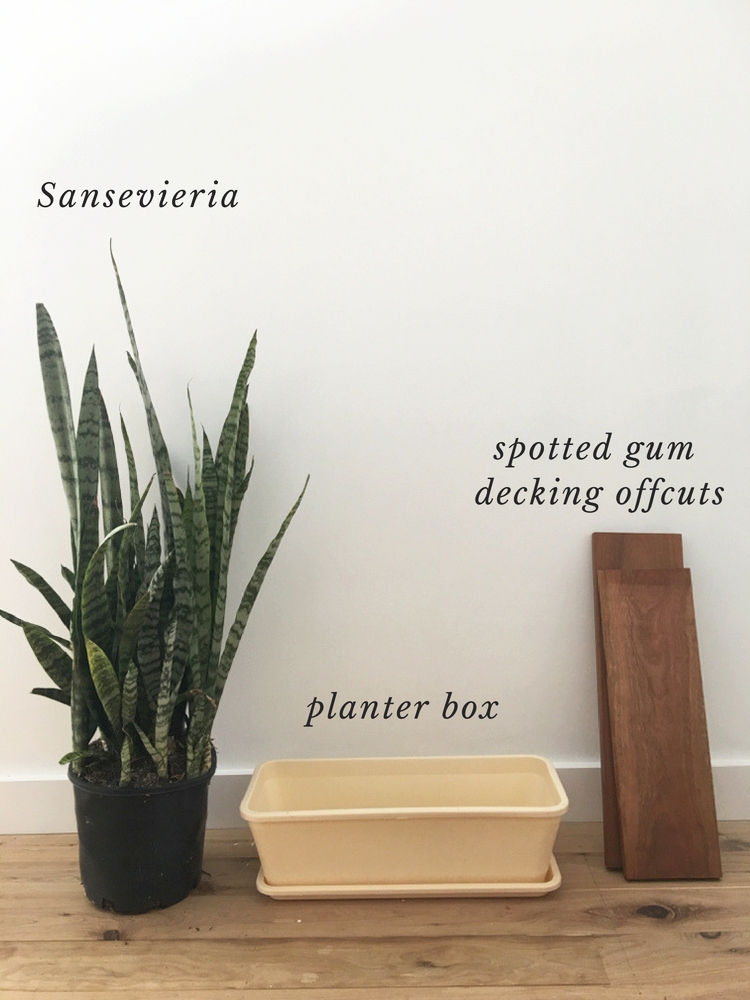
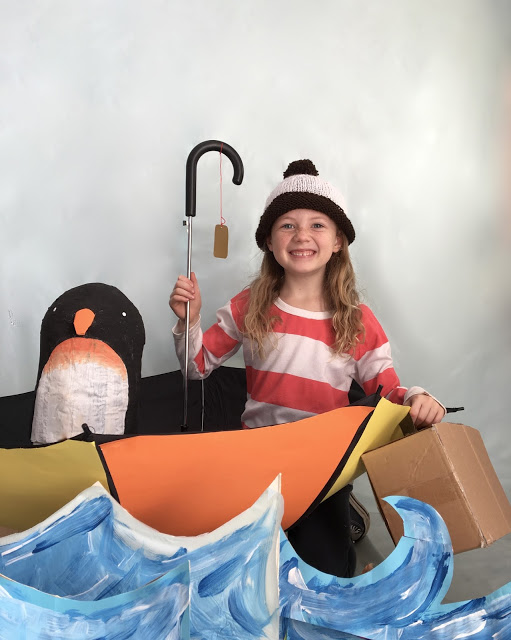
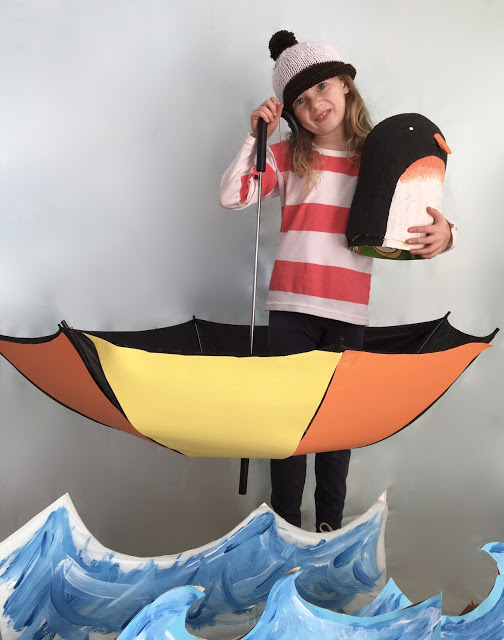
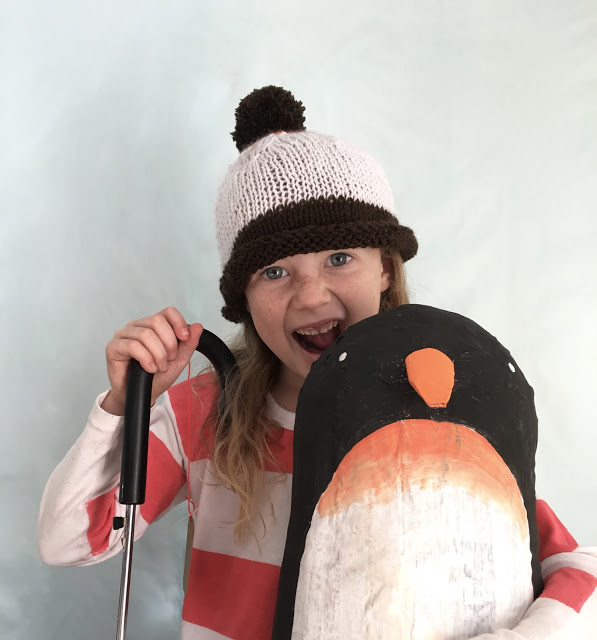
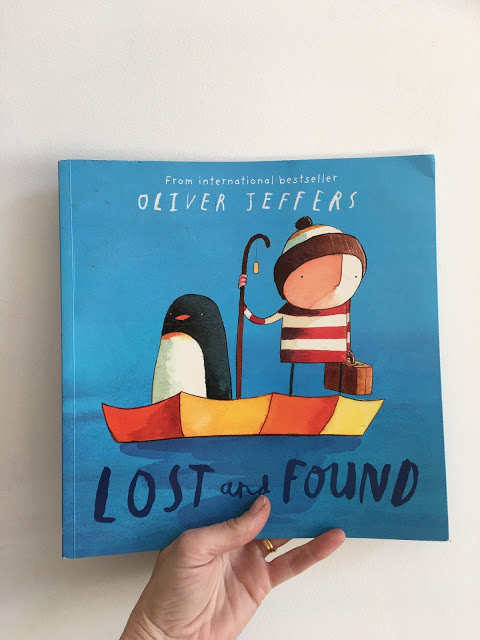
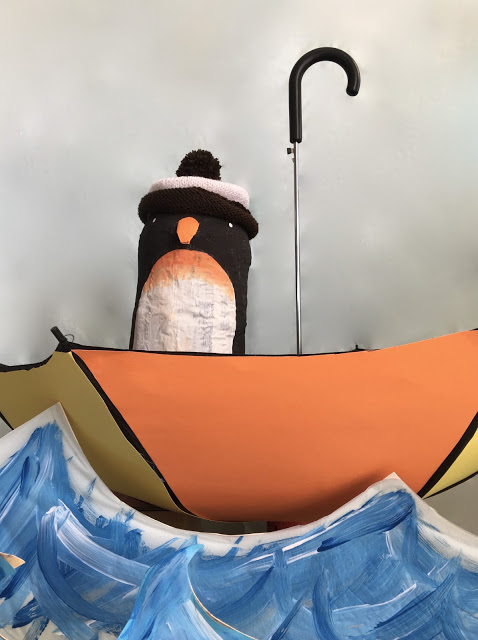
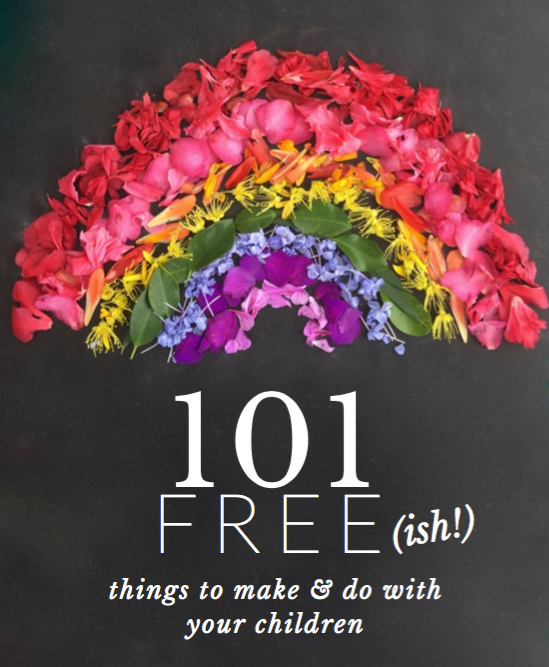
But here I am again, with a new-look site, some new posts and a new ebook - because I miss creating, and writing and sharing. So basically, I’m just going to blog my way - whatever that is! I have things in the works that don’t involve advertising or sponsored posts or lying to you about how fantastic something is because someone sent it to me, because I’m over all that and wish so much it would all go away. And I’m starting with this ebook. It’s free. It’s filled with things you can do and make with your kids (or let them do themselves so you can catch a break - are you enjoying the holidays yet?) with materials you can easily access - and mostly for free! Who doesn’t love free?! Some you might recognise from Instagram or this blog; some are new. There is something for almost every age and most involve simple fun, being out and about in nature and just creating something with your own hands and basic materials.

ebook sample 2.png
ebook sample page 1.png
ebook sample 4.png

It was meant to be ready before the school holidays began, but if you know me at all, you’ll know things always seem to happen when I have a deadline, and things happened. And then I had to work out new programs and platforms and, well, technology and me aren’t the best of friends… But I’m done. I think I’ve worked out how to get it to you in one piece and I hope you like it! If you like what you see in these images and sample pages, enter your details in the form below and a link will be sent to your email address where you can save to your desktop. If you’re already a subscriber (thank you!), I’ll be sending it to you soon in an email. Don’t forget to check your bulk mail/spam folders as files like this often end up there instead of your inbox. If it just doesn’t seem to get to you (it’s entirely possible!), just email me and I’ll send it to you direct. And if you try any of the ideas in the ebook, please share on your social media feeds and use the hashtag #happyhomecraft or just tag me @belindagraham - I’d love to see!

Flower fairy wings
fairywings.jpg

A few years ago the girls and I made some glittery fairy wings for a cousin’s fairy party with wire coat hangers and contact paper. I thought the glitter and tiny star confetti would be so pretty seemingly floating behind them as wings. I always thought the same idea with flowers would be so pretty and suggested them to a friend who asked for flower party ideas. I never really got a chance to try it until I wanted some new ideas for an ebook I’ve just put together. And they’re just as pretty as I imagined! Also pretty to make with autumn leaves for those of you going into the cooler weather on the other side of the world! Here’s how to make them…

fairy wings 1.JPG

Toolkit
Fresh flowers (or try glitter, sequins, leaves, bits of cellophane)
Clear contact paper
Two wire coat hangers
Duct tape
Scissors
Ribbon or elastic

fairy wings 2.JPG

Step 1: Place the two coat hanger hooks together so the triangular parts splay outwards like wings. Have the two hooks overlap each other and use duct tape to secure together.

fairy wings 3.JPG

Step 2: Wrap the tape around the centre until all is covered. Gently pull on the outside ends of the hangers so they bend out to more of wing shape.

fairy wings 4.JPG

Step 3: Cut a square of contact paper that will cover the entire “wing”. Remove the backing paper and place on a flat surface with the sticky side up. Put the “wing” onto the sticky contact paper and then place your flowers - remove petals or place whole smaller flowers into place. Add some glitter you wish for more sparkle!

fairy wings 5.JPG

Step 4: Cut another square of contact paper to cover the other piece, sandwiching the coat hanger and flowers in-between the two sheets. Press together and do your best to remove some bubbles, but due to the non-flat nature of flowers, there will most likely be bubbles!

fairy wings 6.JPG

Step 5: Use scissors to trim around the wings, leave a bit of an overhang from the wire frame so the contact paper sticks together to avoid it opening up. Repeat steps 3-5 on the other wing.

fairy wings 7.JPG

Step 6: Attach ribbon or elastic to the centre parts near the duct tape. Tie around child’s shoulders.

fairy wings front.JPG
fairy wings back.JPG

Annika loved these! We made her a matching fairy wand with a stick and some fresh flowers tied on with jute string. They’d be a great activity at a birthday party or to wear to a dress-up party.

This craft was part of my new ebook 101 free(ish) things to make and do with your children. If you’d like a copy, please subscribe here.


Book Week 2018
book week 2018.jpg

It feels like I only made last year's Book Week costumes last week! But apparently a year has passed and I've spent the last two nights and one day making costumes yet again for a few seconds around the school COLA for the parade. But I love it, and the kids love it, and I could happily make costumes every week for fun if I had the time! The only thing I bought this year was the swirly straw Annika used for her pink milk. And technically poster paints, but I don't really count those because I needed them as I recently had a big craft-cupboard clean-up and my old ones had gone off and needed replacing.

book week 2018 apollo and cheshire cat.jpg

My costumes are usually made from stuff around the house - I've always got stashes of various fabrics, lots of spray paints and craft stuff, and when I know these costumey-events are coming up, I hold onto cereal boxes because I find they're the perfect thickness for making stuff out of! So this year we have...

Zak as Apollo, God of the Sun, Percy Jackson and The Olympians

book week 2018 apollo percy jackson and olympians.jpg

He decided at 4pm the day before the parade he wanted to be Apollo. A bit of frantic Googling and I realised I could do it. A cereal box spray-painted gold would make cuffs, a headpiece, arrowheads, a quiver and decorative aspects of a bow. A branch and few sticks from the fire pile became a bow and arrows, a piece of linen and shimmery chiffon were tied into a tunic/robe and he was good to go. 

Layla as The Cheshire Cat, Alice in Wonderland

book week 2018 cheshire cat.jpg


Layla has now, in her Book Week career, been three characters from Alice in Wonderland. Alice, of course, the Queen of Hearts last year and now the Cheshire Cat. As winter comes to an end, all the white long-sleeved tops the kids have worn as their winter uniform are now pilfered and discoloured, so rather than throw them all out, I keep them cause they make great costumes - i just use poster paint on them with a bit of paper/cardboard inside the shirt to stop the bleed. They're a little stiffer than fabric paints - though still soft enough to wear - but they're only meant to be worn for a day tops, then they're thrown in the dress-up clothes boxes. Mine are now overflowing... So a pair of light grey leggings that Layla had grown out of were paired with a white long-sleeved shirt and I used some grey cotton fabric I had in my fabric box for the tail and ears. To make the white shirt a similar colour I squirted a tiny bit of black poster paint into a water-filled spray bottle, shook it up and sprayed the shirt on the washing line until it had greyed up. Then once dry I spent a ridiculous amount of time painting on dark grey and turquoise stripes - front and back. The morning of the parade, Layla took so long getting ready (as is every morning with Layla) that she only left me with 10 minutes to attempt the Cheshire Cat make-up. It wasn't the best job, but it was good enough!

Imogen (and Saraya) as Annie and Hallie, The Parent Trap

book week 2018 the parent trap.jpg

Immy was so funny - she came home about a month ago asking me what twins her friend Saraya and her could go as for Book Week. I giggled at the thought of these two being twins - as you can see, they look so much alike! But I suggested Tweedle Dee and Tweedle Dum ("ew! nope!"); Thing One and Thing Two ("They're weird") and that was about the extend of my twin character knowledge. "We want to be girls," she whined. Sweet Valley High was the only thing that came to mind until we Googled and then of COURSE we knew The Parent Trap - the kids love that movie. Seeing as a book version existed, we went with that! So for the next four weeks both girls would ask me when their costumes would be done. Clearly Imogen has no clue about how I work because I do things LAST MINUTE around here and so the day before is when their shirts would be ready. I used freezer paper to make a stencil of the camp logo the girls wore in the movie and just used poster paint to paint it on. Then i painted the collar and sleeve rim, spray painted some wooden heart beads I had and threaded some string though it for their lockets and they wore it with their sports shorts and identical trainers. Done! I was waiting for Immy to complain her costume was boring but she was just so excited to be a twin for the day she didn't care!

Annika as Lola, Charlie and Lola

book week 2018 charlie and lola.jpg

Originally this little poppet wanted to be Charlie from Charlie and Lola, but somewhere along the line swapped to Lola. I actually had the perfect Lola dress already - a little long-sleeved floral hand-me-down but she really wanted the dress from I Won't Ever Never Eat A Tomato. So more painting it was! Layla's long-sleeved top worked close enough as a dress, so I taped up some stripes and let her paint them on. I hot-glue-gunned on a Peter Pan collar, painted a plastic bottle pink and threw in a swirly straw for her pink milk fix. I also just drew some teardrops and had her colour them in, then cut them out and glued them onto some bobby pins for her little butterfly clips. I love Charlie and Lola and have always wanted to do a birthday party in that theme cause I thought the decorations could be so much fun! I might still have to do that....

So next up is Halloween - I'm making Layla go as the Cheshire Cat again because darn it those stripes took forever and I want to get my time's worth out of them! And also because I kind of want to have another go at getting that make-up right! 

Timber offcut wall niche planter box
wall niche planter 10.jpg

If you've ever renovated an old house you'll know how weird and wonderful they can be! Our home had a fair few quirks once we started ripping walls down and measuring up for the extension. One of the biggest dramas (because there is always drama of some kind during a renovation!) was that the centre of our house was not quite the centre of the house. In fact, it was out by 10cm (that'd be 100mm in tradie speak. I'm still getting my head around talking in millimetres!). It doesn't sound like a huge amount but when you're lining up the steel posts that need to reach from the foundation all the way up to the centre of the roof - seven metres higher - it is a royal pain in the butt and meant a whole lot of mucking about with various components of the extension being increased by tiny increments so the centre of the extension lined up with the centre of the existing house. They got it to work, but it left us with an extra thick wall - two and a half times thicker than a normal wall. So, as we've done with all little hiccups throughout our renovations, we just made it work. And we thought a nice deep niche would be a good way to highlight what would otherwise be considered a bit of a flaw.

wall niche planter 2.jpg

And when Steve brought some decking offcuts home from a job, I got to thinking: wouldn't this beautiful wide-planked spotted gum wood look smashing as a planter box in our niche? Yes, my thoughts said, yes it would.

wall niche planter tools.jpg

So I looked around for something to fit the space and found an el cheapo $5 plastic planter from The Reject Shop which miraculously fit onto the ledge. Steve worked his magic with some mitre cuts and whipped me up this lovely wooden surround which now houses a very thriving Sansevieria Plant. I can easily slip it out to give it some extra light should the need arise. 

wall niche planter 6.jpg
wall niche planter 5.jpg

I sanded the timber really lightly and gave it a bit of a rub down with some homemade beeswax polish and it's been perfectly perfect ever since. And MOST importantly, I haven't killed my plant. This is quite the news! Of course I now have a list as long as my to-do list of things to make with decking offcuts (and my to-do list is reaaallllly long). Stay tuned!


Book Week costume: Lost and Found boy
lost and found cover.jpg

Our household adores Oliver Jeffers. He can do no wrong! His illustrations and stories are so sweet and heartwarming. And those characters he comes up with? Adorable! They're the perfect little characters to bring to life. I wanted to recreate the cover of

Lost and Found

as soon as I saw it. I got close one day when Annika sat in an upside down umbrella at the cricket but there was a cute penguin missing and she wasn't wearing the right gear so I figured a future Book Week would be the right time. And here we are! I asked Immy if she was keen to wear it in the parade and she was so excited and wanted everything perfect - down to the tiniest detail like a little brown suitcase and a tag hanging from the umbrella handle. No pressure, Immy... Well, it may not be perfect but it turned out pretty cute anyway! I don't normally like buying things with the sole purpose of destroying them but when I realised I had already thrown out my old umbrella that didn't close, I searched for a cheap one - this was a whole $4 so I had no problem cutting a hole in it. Especially after one of the inside arms broke within two minutes of Annika stealing it and walking around the house with it. That's what $4 gets you I guess! Painting umbrella fabric wasn't very successful so I bought some yellow and orange cardboard and cut them up. At first I used double-sided tape to stick them on, but after they came away it was the hot glue gun to the rescue yet again!

Lost and Found

umbrella costume tutorial

You'll need...

A small-to-medium-sized umbrella you're happy to ruin. A hooked handle is even better

2 sheets of orange cardboard

2 sheets of yellow cardboard

Black paper or cardboard (optional)

Hot glue gun

Brown kraft paper 

String

Scissors

Step 1:

Measure up the cardboard against the umbrella - you want it in-between the metal parts. Cut to size and hot glue gun into place.

Step 2:

Overlap at the centre of the umbrella and continue all around alternating the colours.

Step 3:

Cut a circle from the black card or paper and a smaller circle from the middle and slide it over the point of the umbrella and glue in place to 

hide all the joins of the cardboard.

Step 4:

Turn the umbrella over and see where you want the legs to go. I used liquid chalk to draw a quick outline and then just cut through the plastic and into the cardboard. Cut the two pieces together for the neatest line. 

Step 5:

Reinforce the cardboard with some more glue around the edges of the hole.

Add a little kraft paper tag from the handle, insert child and have them hold the umbrella and hug a penguin. We made our penguin from paper mache but if you're not that keen (I realise I'd be in the minority here!)  maybe you can make a child's day/week/month/year by buying them a penguin Beanie Boo (dear god WHAT IS WITH THOSE THINGS? Why do they love them so much?!) 

And also... We didn't have a red and white striped shirt BUT we did have a very stained plain white one so I grabbed some red poster paint and got painting. I stuck good old plain sticky tape into stripes on the top and painted in-between - it made the perfect stencil by peeling off easily and didn't bleed! Steve knitted the hat in the right colours (not that you can really see the orange band!). And a tiny suitcase was also made with a plain brown box, some kraft paper to cover up the stamps, and a little leather strap glued on the top as the handle. And that's it! Imogen is so excited and can't wait for the parade (though I'm sure I'll be carrying home an open, ruined, yellow and orange umbrella as soon as the parade is over!) 

Luckily Zak just wants to be Klaus from

A Series of Unfortunate Events

which pretty much involves a pair of glasses, a collared shirt and jumper and maybe a book or two?!? At least it's not a

Clone Trooper

this year! 

I'm thinking this one might be my favourite of the three I created this year (I also made the blue crayon from 

The Day The Crayons Quit

 and The Queen of Hearts from 

Alice in Wonderland

). Which do you like the most?